Readings:
- Always already programming by Melanie Hoff
- Programming is sculpting by Amy J. Ko
Welcome to the first week session of Creative Computing! In this session, we will look into exploring what ‘code’ means to us - this classroom, as artists, and technologists, and everything in between and everything beyond.
While all of us do have an inherent understanding of what code is, or what it means, or how it looks like - this class is also the time and space for us to unpack what it entails - especially, what does it mean for us to write code? And what is the impact of the code we write? Also, what does code mean to us? Social code? Moral code? Legal code? Code in DNA?
To help us unpack these questions and more importantly, to help us set the context for the upcoming 10 weeks of this module, I am adding a couple of readings below. We will look into these together in the class.
Discussion
Let’s break it down further and start with our first question - what is code?
In groups, let’s discuss this question. What are your thoughts on what code means to you? If you’re unsure, look up all the different definitions of code and try to map what they mean (if they even mean something). Can you make a diagram of what code means?
You’re also welcome to go through the two readings below to further expand upon what you’ve been discussing.
Readings:
For today’s workshop session, we will briefly look into p5.js and how we can use it to make art. But before, we have something more important to understand and setup - THE ENVIRONMENT.
Interesting how every bit of language around technology and tools is deeply situated in anthropomorphocizing the practices. Whether it’s calling the computer a “machine” or “robot”, or calling the tools “environments” or “ecosystems”. This is something we will keep coming back to.
For this module, the only environment we are going to setup is the operating system itself. We’ve had some brief conversation about this during the induction week - but let’s go through it again.
An operating system is like the first layer of software that brings the hardware together. The latest GPU, maxxed out RAM, and the latest processor - all of these are hardware. Operating systems make sure the hardware, well, ‘operates’. However, they also come with their own set of limitations, constraints, and politics. Windows and MacOS are only two examples of operating systems. There’s so many more - but probably the other one that is worth mentioning is Linux. Linux itself is an open-source operating system, and it comes in different flavors - distributions. Although, for the most part, Linux itself is built on the same idea of an architecture - each flavour adds its own distinct take on how it should look and work. These distributions, or distros, are like different versions of the operating system - same same but different.
For this class however, we are going to be using Ubuntu. It’s one of the most popular Linux distros - which also means that packages on these systems are well supported, maintained, and updated. On top of that, if you’ve not used Linux before, Ubuntu’s GUI is also very intuitive. It looks like any other operating system you’ve used before - perhaps the icons and colours might be a different shade, but the overall experience is very similar.
But why not Windows or Mac?
There are a few reasons why we’re using Linux. Firstly, Linux is open-source - which means that it’s free to use, free to modify. Throughout this programme, we will get more and more into open-source cultures and communities. Secondly, Linux is cross-platform - which means that you can use it on any device - whether it’s a desktop, laptop, or even a phone. Android is in a way built on Linux. Raspberry PIs run their own distributions of Linux. If you’re interested in servers (I love working with servers, if this sounds of interest - come say hi), Linux is the go-to operating system. All this means that if we familiarise ourselves with Linux, our lives as developers is going to be a lot easier. We’ll spend less time trying to fight the machine.
Apart from this, another reason is also flexibility and freedom to install, modify, update software and packages. Because we are going to be based in the UCL Cluster Room, which is a shared space, there is also a security risk in opening the systems. Things are more strictly monitored and controled to avoid risks over the network. But for us, as artists, who are trying to experiment and push with these systems - this might not be the best fit. Hence, we’re using Linux. As a Virtual Machine (VM).
A Virtual Machine is a software implementation of a computer that runs on top of another computer. It is a complete computer system that can run its own operating system and applications. VMs are often used to run multiple operating systems on a single physical machine, or to run a different operating system than the one that is installed on the physical machine. So in a way - our Linux talks to the Windows on the computer and the Windows talks to the hardware. One more layer of abstraction (we will get more into the idea of abstraction in the coming weeks).
p5.js is a JavaScript library that makes coding accessible for artists, designers, educators, and beginners. It is based on the Processing programming language and is designed to be easy to learn and use. Processing was developed by Casey Reas and Ben Fry, both of who are artists you should look into. They were studying at MIT and developed Processing as a tool for artists to experiment with code. p5.js is a version of Processing, and is designed to be easy to learn and use. Especially on the web, and for the web.
![]()
[p5.js] is technically, a library. It is a collection of functions and objects that can be used to create interactive and dynamic visualizations. It is a framework that provides a set of tools and functions for artists to experiment with code. But the .js part of it means that it is written in JavaScript, which is a programming language. So the code we are writing is actually JavaScript, but we are using p5.js to make it easier to write.
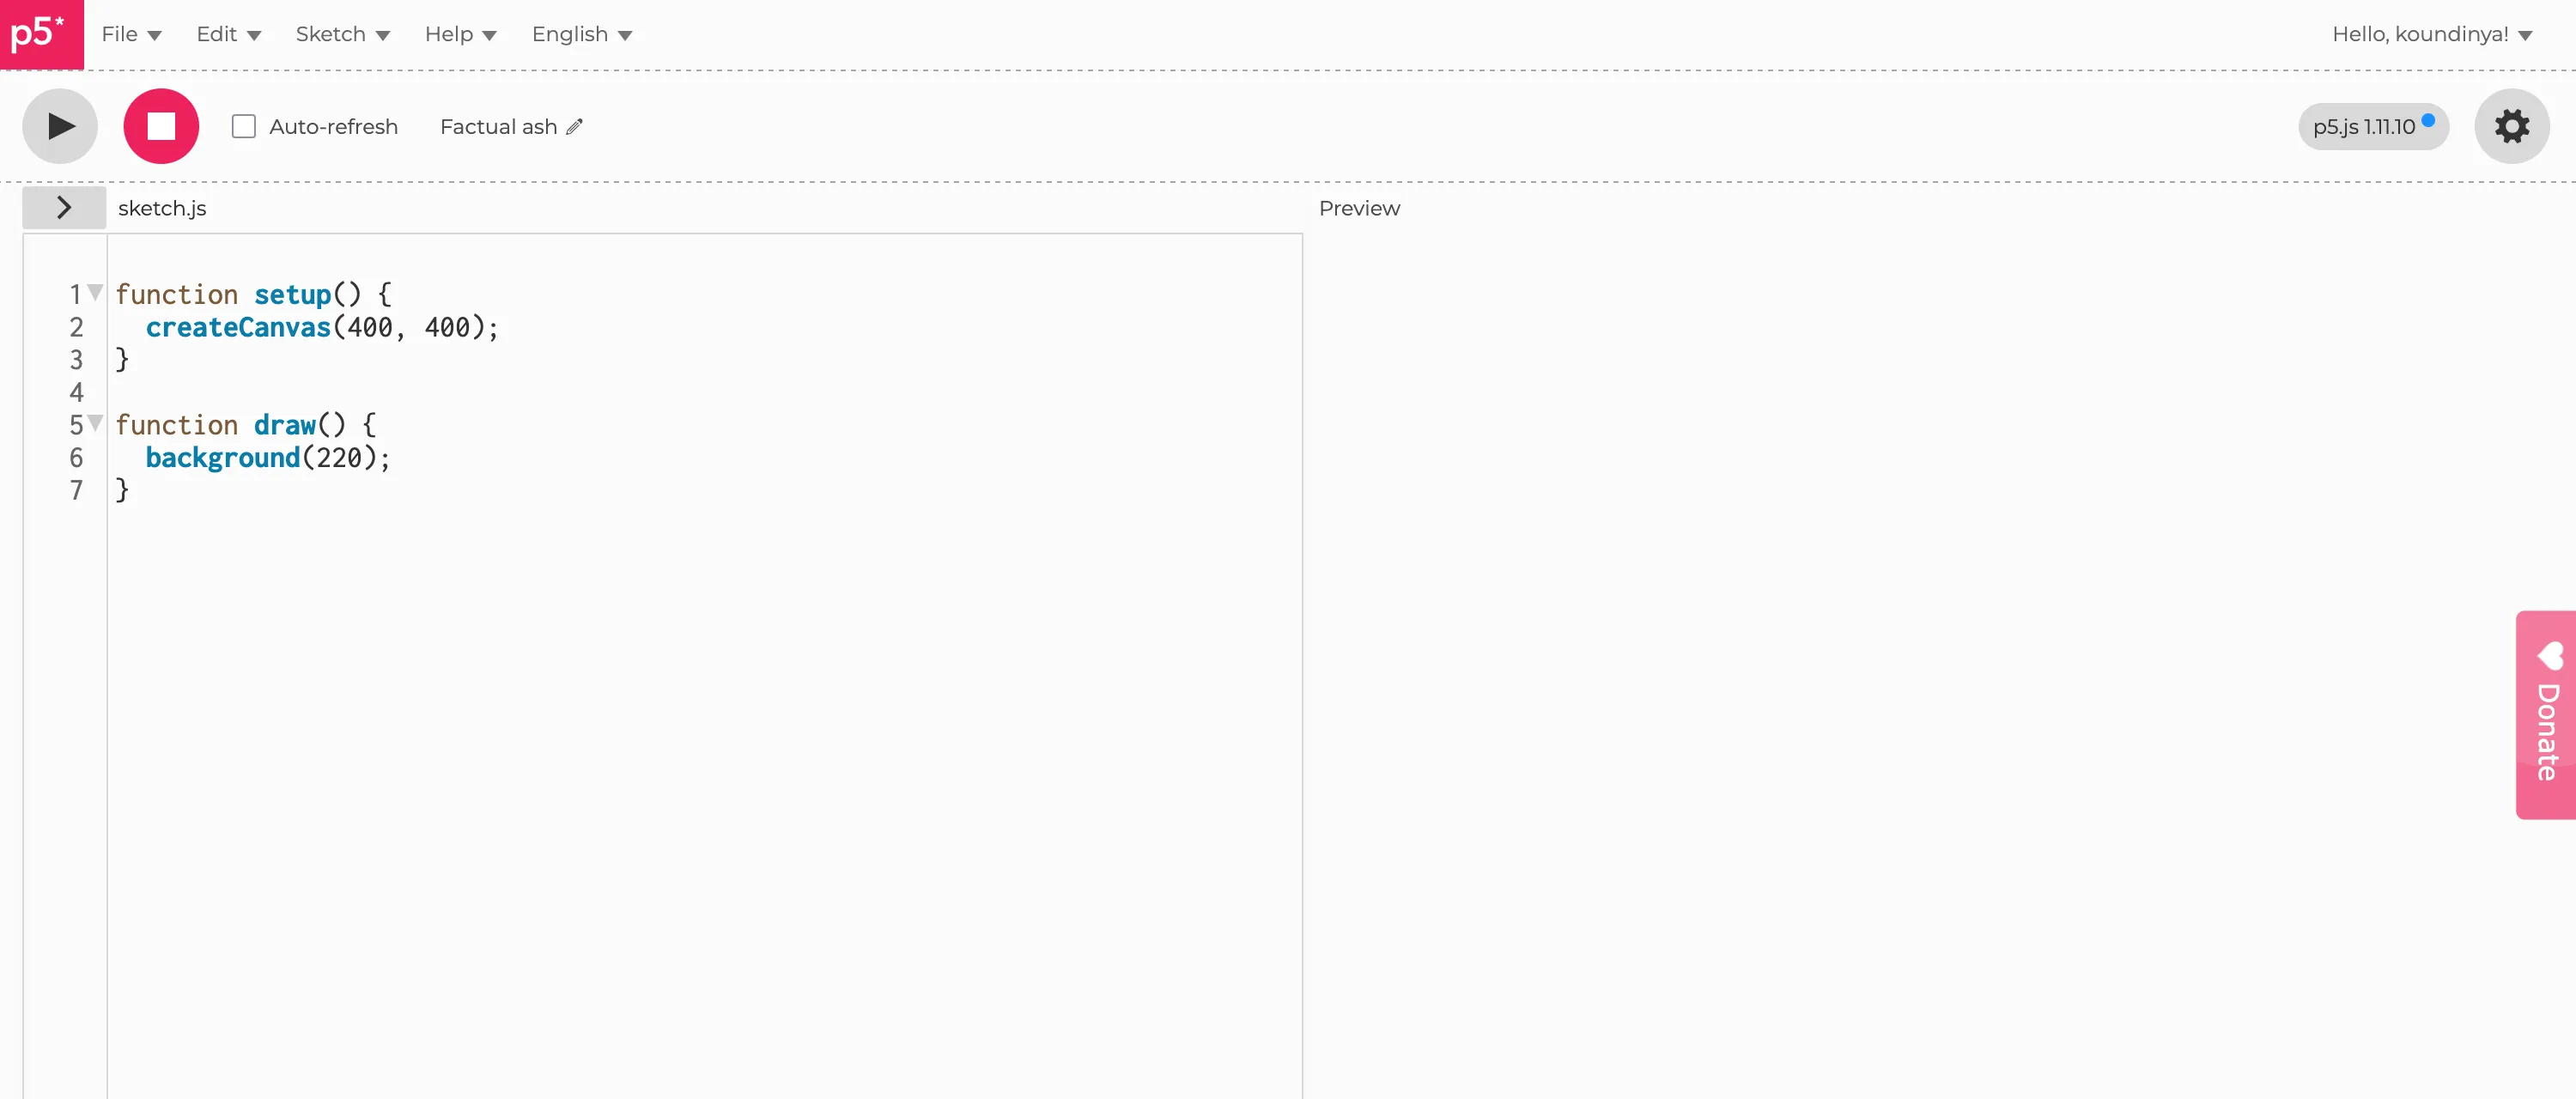
To begin this class, we will use the p5.js Web Editor. It is a simple and easy-to-use interface that allows you to write and run p5.js code without having to set up a local development environment. I highly recommend making an account on the p5.js Web Editor. It will allow you to save your work.
This is how the first page should look like
But how does it work?
For now, we are going to remove the draw function and just keep the setup function. We will get into the draw function in the next week. So our code should look like this:
function setup() { createCanvas(400, 400);}This is a very basic sketch. It will create a canvas of size 400x400 pixels. The createCanvas function is a p5.js function that creates a canvas element in the HTML document. The setup function is a p5.js function that is called once, when the program starts. All of this code is still JavaScript, remember?
In the background, p5.js is doing all the heavy-lifting for us. It sets up everything and gives us handy functions to draw on the canvas. For example, it allows us to create any geometrical shape, add colours, and animate them.
Fundamentally, p5.js works with a cartesian coordinate system. The origin (0,0) is at the top-left corner of the canvas. The x-axis runs horizontally from left to right, and the y-axis runs vertically from top to bottom.
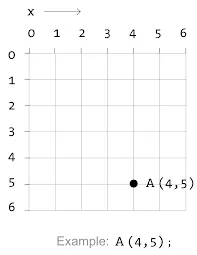
This is only a representation of the coordinate system. The actual coordinate system is infinite (theorically). Think of each point as a pixel. So an item at (0,0) is at the top-left corner of the canvas, and an item at (400,400) is at the bottom-right corner of the canvas. Which also means that an item at (200,200) is at the center of the canvas.
Let’s do that with p5 now.
function setup() { createCanvas(400, 400); point(200,200);}
Not sure if you can see, but if you zoom in, there is a tiny little pixel in the center of the sketch.
This is the general idea of how p5.js works. It is a grid of pixels, and we can draw on it. Imagine any shape, and we can draw it on the canvas.
Let’s do that with a rectangle -
function setup() { createCanvas(400, 400); rect(200,200,100,100);}But what is the 100,100 now? Let’s take a step back from p5 and try to break down general geometric shapes.
Rectangle
A rectangle is a shape with four sides and four right angles. It has a width and a height. The width is the distance from one side to the other, and the height is the distance from the top to the bottom.
Which means that for us to draw a rectangle on screen, we need to know the following:
Those are exactly the parameters of the rect function in p5.js.
parameters or arguments or inputs are the values that we pass to a function to make it do something. As a general rule of thumb, they are usually contained within a set of parentheses ().
So if we want to draw a rectangle on screen, we need to pass the following parameters to the rect function:
rect(x, y, width, height);x is the x-coordinate of the rectangley is the y-coordinate of the rectanglewidth is the width of the rectangleheight is the height of the rectangleBut what if the width and height are the same? Then it is a square.
Ellipse
An ellipse is a shape with four sides and four right angles. It has a width and a height. The width is the distance from one side to the other, and the height is the distance from the top to the bottom.
Which means that for us to draw an ellipse on screen, we need to know the following:
Those are exactly the parameters of the ellipse function in p5.js.
So if we want to draw an ellipse on screen, we need to pass the following parameters to the ellipse function:
ellipse(x, y, width, height);x is the x-coordinate of the center of the ellipsey is the y-coordinate of the center of the ellipsewidth is the width of the ellipseheight is the height of the ellipseBut what if the width and height are the same? Then it is a circle. But there’s also a circle function in p5.js, so we can use that instead.
Line
A line should be rather simple, right? A line is just a line that connects two points. That’s really it. But it’s also important we understand what a point is. In our first example, we drew a point at (200,200) - the center of our sketch. That’s the x and y coordinates of the point.
So if we want to draw a line on screen, we need to know the following:
So if we want to draw a line on screen, we need to pass the following parameters to the line function:
line(x1, y1, x2, y2);x1 is the x-coordinate of the start position of the liney1 is the y-coordinate of the start position of the linex2 is the x-coordinate of the end position of the liney2 is the y-coordinate of the end position of the lineColours are a bit different in p5.js. Because we also need to be specific about what do we mean by colour? Do we mean the actual colour of the shape, or the background, or the stroke?
But before we come to that, let’s first understand how colours work in p5.js. p5.js uses a system called RGB to represent colours. RGB stands for Red, Green, and Blue. Each of these colours can be represented by a value between 0 and 255. All the colours we can imagine on the color spectrum can be represented by a combination of these three colours.
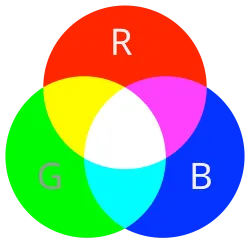
So if we want a colour that’s fully red, we need the value of red to be at the higest, with no values for green and blue. So that would mean
| Red | Green | Blue |
|---|---|---|
| 255 | 0 | 0 |
What if we want a different colour? We can change the values of red, green, and blue to get different colours.
The values for R, G, and B are between 0 and 255. The higher the value, the brighter the colour. The lower the value, the darker the colour. So the value 255 is the brightest, and the value 0 is the darkest.
Let’s start using colours now. First, let’s begin by adding a background colour to our sketch. We can use the background function to do that.
function setup() { createCanvas(400, 400); background(255, 0, 0);}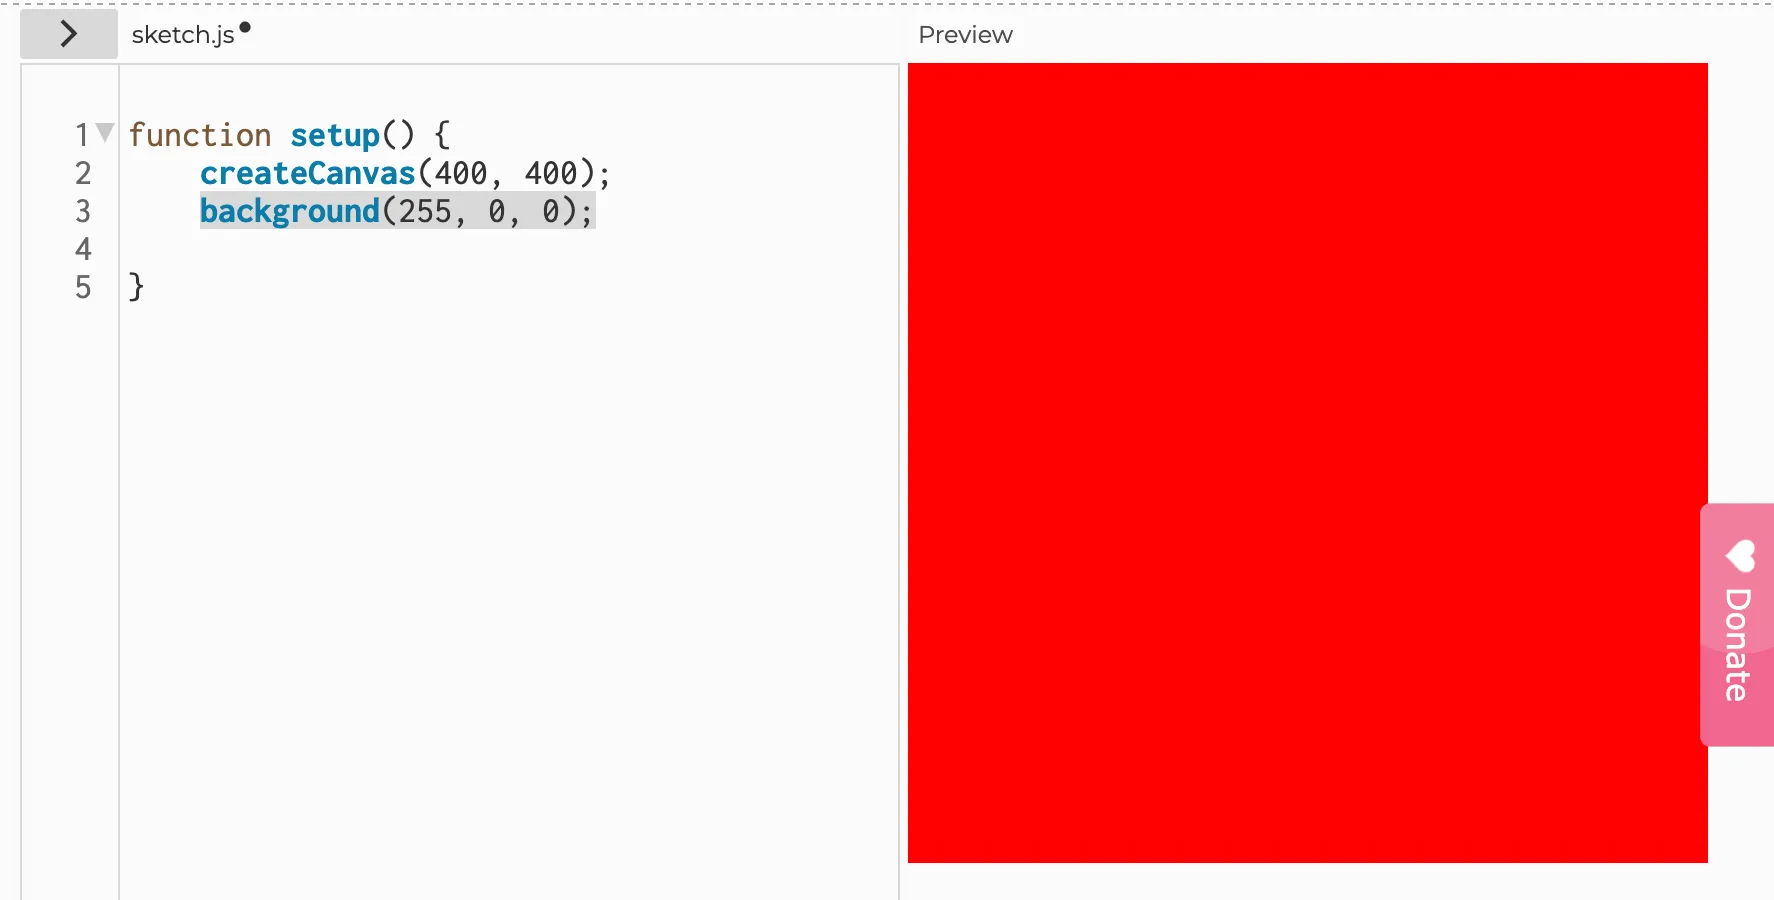
Now things get a bit more interesting. We can add colours to our shapes. But we need to be specific about what do we mean by colour? Do we mean the actual colour of the shape, or the background, or the stroke? Because we have different functions to do each of these.
First, let’s start by adding a colour to our shape. We can use the fill function to do that. So we’re filling that shape with a colour.
function setup() { createCanvas(400, 400); // setting up our canvas background(255, 0, 0); // set a background colour of red rect(200, 200, 100, 100); // draw our rectangle fill(255, 255, 0); // set a fill colour of yellow}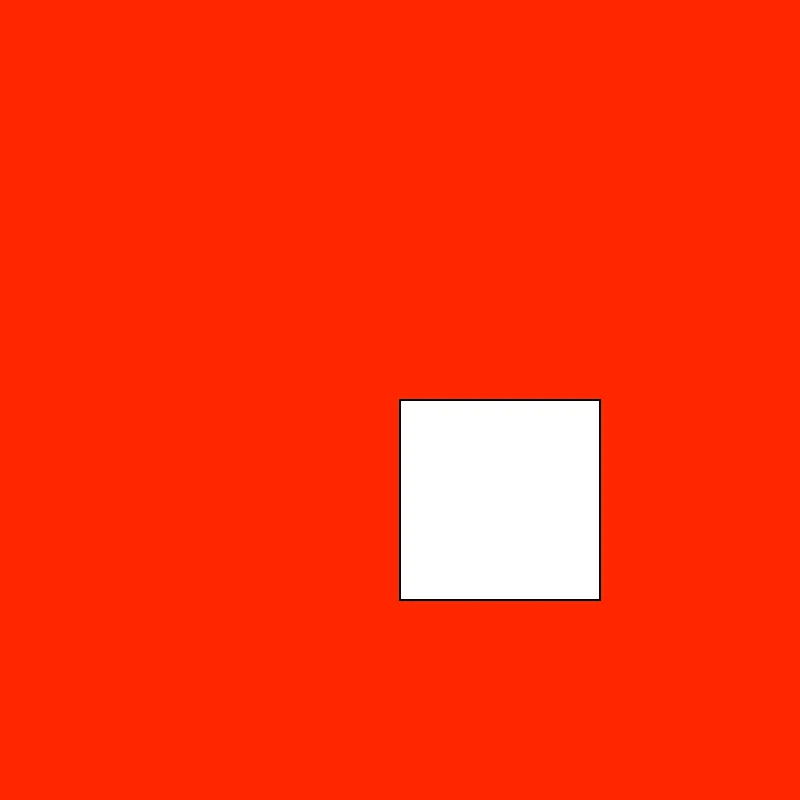
But wait, we can’t see the yellow colour we added! Why is that?
Order of operations
Think of each line of code we write as a step in a recipe. We need to follow the recipe in order, and we need to follow it step by step. You can also think of it as adding layers of pixels to the canvas. If you’re worked with Photoshop, Illustrator, or any other image editing software, you might have come across the concept of layers. So, in a way, each line of code we write can be seen as a layer.
Now coming back to the colour of our rectangle which isn’t working (yet) - we need to think about the order of operations. We have all the lines of code we need. We have a createCanvas which creates a canvas for us to draw on. We have a background which sets the background colour of the canvas. We have a rect which draws a rectangle on the canvas. We have a fill which sets the fill colour of the rectangle.
Only modification we need to make is to add the fill function before the rect function. So we set a fill colour and anything and everything we draw after that line will be filled with that colour.
function setup() { createCanvas(400, 400); // setting up our canvas background(255, 0, 0); // set a background colour of red fill(255, 255, 0); // set a fill colour of yellow rect(200, 200, 100, 100); // draw our rectangle}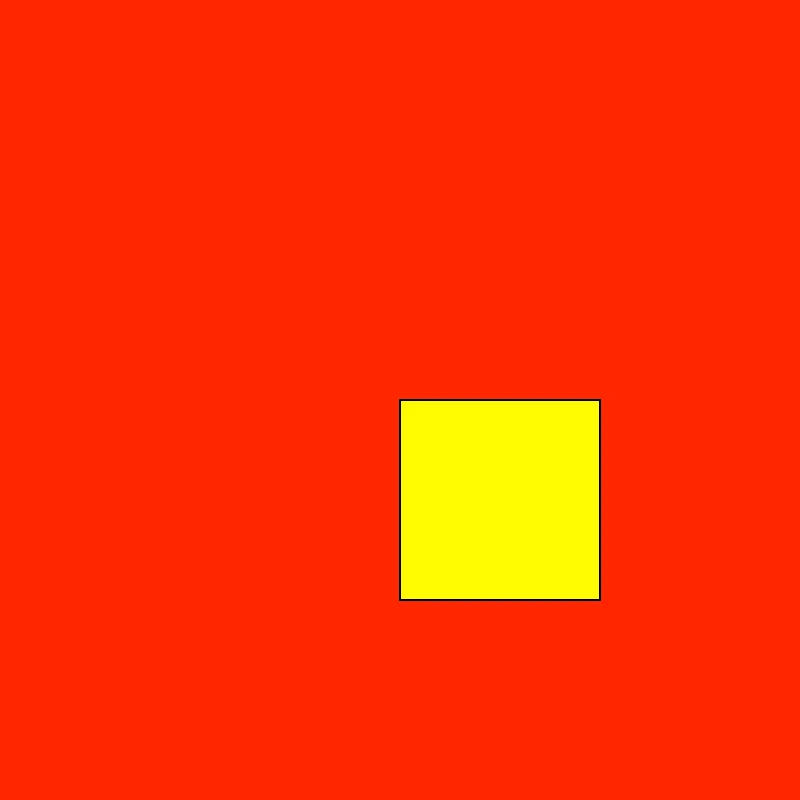
So if we start adding more shapes to our canvas, all of them will still carry the same colour.
function setup() { createCanvas(400, 400); // setting up our canvas background(255, 0, 0); // set a background colour of red fill(255, 255, 0); // set a fill colour of yellow rect(200, 200, 100, 100); // draw our rectangle ellipse(100, 200, 50, 80); circle(10, 20, 20)}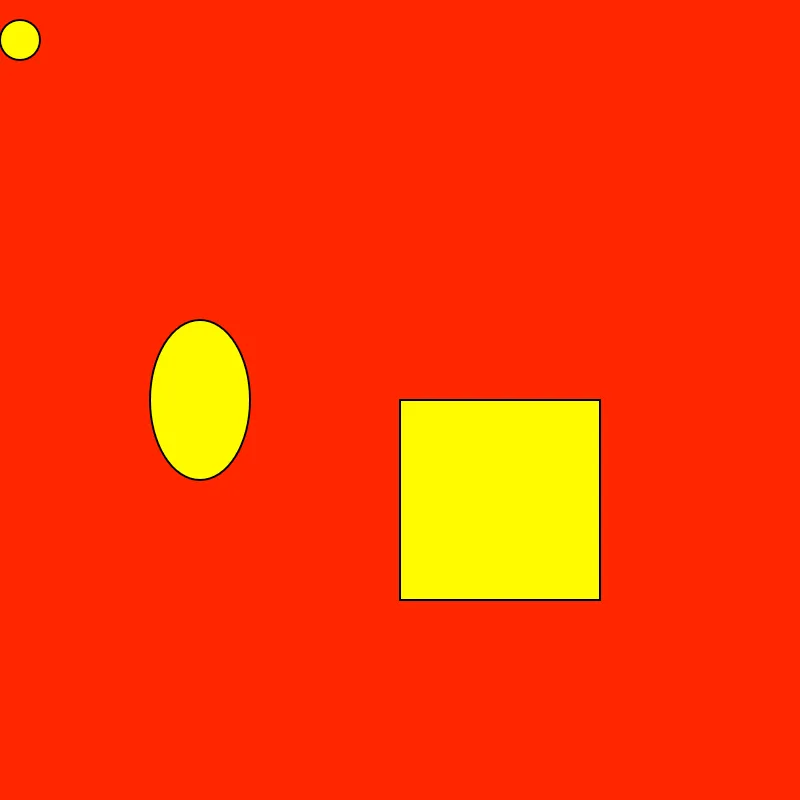
But what if we want to start adding a different fill colour to each shape? We can use the fill function again to reset the colour. We can use the function as many times as we need to reset
So, let’s say if we want to first draw a circle with a fill colour of red, then a rectangle with a fill colour of green, and then a triangle with a fill colour of blue. We can do that by using the fill function multiple times.
function setup() { createCanvas(400, 400); // setting up our canvas background(255, 0, 0); // set a background colour of red fill(255, 255, 0); // set a fill colour of yellow rect(200, 200, 100, 100); // draw our rectangle fill(255, 0, 0); // set a fill colour of red ellipse(100, 200, 50, 80); fill(0, 255, 0); // set a fill colour of green circle(10, 20, 20)}Same rule applies to stroke as well. stroke is the outline of the shape - the border colour.
That’s the basics of setting up a p5.js project on the web editor, and drawing basic shapes and colours. Next week, we will build upon this and start adding some movement on the screen and get a bit more into more functions p5 has to offer.
For your first assignment, create an “algorithmic self-portrait” using p5.js. Begin by reflecting on a feeling, memory, or aspect of your identity that you wish to express. Your task is to translate this into a visual composition using only the most basic drawing commands: points, lines, rectangles, ellipses, and triangles. Structure your code with setup(), and experiment with how the placement, size, and colour of shapes might evoke your chosen theme.
As you work, consider the ideas in the two essential readings from today (find them at the top of this page). How does the act of writing code, with its rules and logic, change your relationship to drawing or self-expression? Does the algorithmic process feel restrictive, liberating, or something else? In a short reflection (150–200 words), describe what you chose to represent, how you approached the translation from idea to code, and how the process made you think differently about both art and technology.